Hiking Guide- Flying Mountain

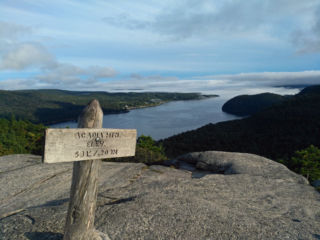
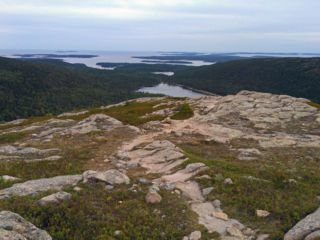
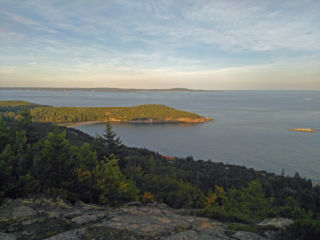
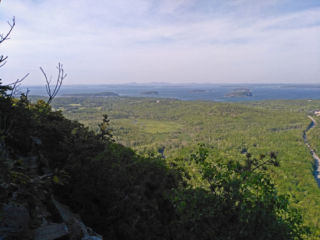
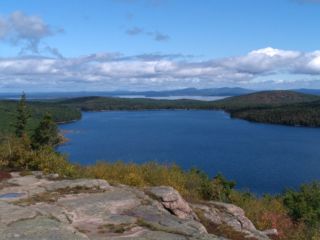
At just over 280′, Flying Mountain is more of a rocky outcropping than a true mountain, even by Acadia’s standards. It was named by the native Abenaki, who thought that the hillock appeared to be leaping or flying from the surrounding mountainsides. Despite it’s modest height, the short 1.5 mile hike to the summit offers truly beautiful vistas that make the trip worthwhile. The trail is a moderately steep scramble over cobbles and tree roots, interspersed with a series of graded steps. For this reason, it is not suited to those with mobility issues, though hikers of average fitness should find the climb relatively easy due to it’s short length. The hike is a favorite among kids, but be forewarned that the few rugged areas and drop-offs  do require some level of parental diligence. Once at the top, you will be rewarded with serene views of Sommes Sound and the Cranberry Isles beyond. There is a normally a very pleasant side trip that can be added to nearby Valley Cove, but the trail was sadly closed for maintenance during our visit. Directions: From the Mira Monte Inn, take Mt Desert St (Eagle Lake Road) west to hwy 102. Turn left on 102 toward Southwest Harbor. In about 5.4 miles, turn left of Fernald Pt Road. In about .75 miles, the trailhead will be on the left.


Acadia Hiking Guide: Hadlock Ponds

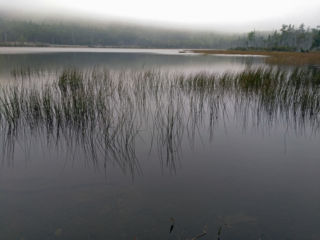
Upper Hadlock Pond

Upper Hadlock Pond in the fog


Not all hikes offer spectacular views of the ocean and lakes, but what good are those hikes on foggy days? There are plenty of hikes that weave in and around the mountains and lakes that offer tranquility and peace. The Hadlock Ponds area is one of those worth taking in on foggy days.

One good thing about these hikes is that there are plenty of different loops that one can do. I prefer the hike that starts out near Lower Hadlock Pond and comes back around by Upper Hadlock Pond. It takes about an hour-and-a-half and can be done in multiple different ways. We recommend having a trail map with you because there are also plenty of non-Acadia hiking trails (read: private property) that are definitely OK to hike on but aren’t as well signed as those in the actual park. This is especially true on the southern end of Lower Hadlock Pond (Schoolhouse Ledge in particular).

I start out at the Brown Mtn. Gate parking lot and cross Rt. 198 to find the trail that will take you to Lower Hadlock Pond. Go right at the pond and follow that to the end until you get to the wooden bridge. To stay on Lower Hadlock, and to do the easier hike up Norumbega Mtn, go left. To head north, as I do, stay right until the next trailhead. At that next trailhead, go left toward the Goat Trail parking lot. Take this until you get to one of the parking areas off Rt. 198 an the start of the Goat Trail hike, which is the harder trail going up Norumbega Mtn..

From there, cross the street to the north side of Upper Hadlock Pond. At the carriage trail, you can go right on the carriage trail, which will bring you back to the Brown Mtn. Gate parking area, or you can head straight up to continue on the Hadlock Brook Trail. Going straight probably adds about 30min to the hike or so. I like to stay on the carriage trail because I like the walk along there, especially with my dog in tow (or in the lead, depending on how many chipmunks are about). The carriage trail is the Around Mountain trail.

Along the carriage trail you’ll eventually find the Hadlock Ponds Trail on the right. If you take that, it’ll cross back over Rt. 198 and bring you back to Lower Hadlock Pond and eventually the wooden bridge. I stay on the carriage trail still. When on the carriage trail, you’ll come to a couple of sign posts. Just follow the road back to the Brown Mtn. Gatehouse and all will be well.

The entire hike the way I described it is about 1.5 hours. Staying on the Hadlock Brook Trail makes it about 2 – 2.5 hours, and cutting over to the Hadlock Ponds Trail is about 2 hours flat.

For info on what these hikes are like, come stay with us and we’ll gladly point you in the right direction: www.miramonte.com.

Acadia Hiking Guide: Acadia Mountain

Acadia Mountain

Somes Sounds from atop Acadia Mountain

I always say beware the smaller mountains in Acadia because they tend to be the steepest. Acadia Mountain is no different. In fact, where Acadia Mtn. is located there are two of the smaller-yet-steeper mountains on the island, with St. Sauveur being the other. And yet these smaller mountains often offer intimate views that the larger mountains don’t. The four mountains in this area just north of Southwest Harbor are no different.

Acadia Mountain is probably the most popular of the four mountains: Acadia, St. Sauveur, Valley Peak, and Flying Mtn. are all nestled together in the Valley Cove area. Parking is in two places. The spot off Clark Point Rd. doesn’t have much space, but is best if you’re tackling Flying Mountain and Valley Peak. The more popular parking area is the Acadia Mountain lot just off Rt. 102 near Echo Lake.

From the lot, cross the street, and you’ll find your first decision. It doesn’t matter if you go left or straight, as both will take you to the Acadia Mountain trailhead. Going left is a bit faster, but straight is better for St. Sauver Mtn. Now, I normally recommend going up the steeper hike and coming down the less-steep trail, but with Acadia that’s different because the steeper trail on the back side of the mountain has better views that are right in front of you as you hike down.

So having said that, go up the trail that’s closest to the road. At the top, enjoy the magnificent views of Somes Sound and Valley Cove. Head down the other side, keeping those views in front of you, until you get to the Man-O-War Truck Road. Follow that to the right will bring you back to the parking lot.

Acadia Mountain itself, up and down, is about 1.5 – 2 hours long. However, if you’re looking for a good, full day of hiking then tackling more than one peak will definitely get your exercise in. Adding St. Sauveur will add another two hours to Acadia, and then adding Valley Peak and Flying Mtn. will add another 2-3 hours on top of that. In total, doing all four peaks, car-to-car, it’s about 6-8 hours and a lot of hiking up and down. The good thing here is that there are loops and one can keep going or call it quits and head back to the car without too much trouble.

And after a long, hot day of hiking, head back to the car and walk down the Echo Lake Bluffs trail to grab some excellent swimming.

For more info on how to do this, check our availability calendar and we’ll be happy to give your our local advice: www.miramonte.com.

Acadia Hiking Guide: Connor’s Nubble

Connor's Nubble

Two waters as seen from Connor’s Nubble

Connor’s Nubble is one of the easiest peaks you’ll bag in Acadia, except that it takes a long time to get to the trailhead. Even so, it’s not difficult hiking at all, as it’s the distance that will give you your exercise. And it has a surprisingly awesome view from the top, so this is one of those I definitely recommend.

There are a couple of different ways to get there, but both are about the same. If you go from Bubble Pond, it’s shorter but a bit more complicated. Still, going from Bubble Pond also gives you a chance to do North and South Bubble at the same time, giving you three peaks in one shot. I almost always go via Eagle Lake, and that’s because I walk my dog out there a couple of times per month.

Park at the Eagle Lake parking lot, either the one at the bridge or at the boat launch. From there, you’ll want to head on the right-hand side of the lake. It really doesn’t matter to be honest, but Connor’s Nubble is on the right side of the lake if heading south from the parking lots.

Now, before you get to Connor’s Nubble you’ll come across the southern trail that goes along Eagle Lake’s southern edge. This hike is actually a very difficult hike despite having no elevation gain. It is difficult because of the large number of good-sized unbalanced boulders that are hard to scramble around without losing balance. Hiking Poles is recommended for this hike, which crosses right below Connor’s Nubble for a good portion of the hike. If you want to do Connor’s Nubble, we recommend skipping the Eagle Lake South Shore Trail (however, see below…).

At some point you’ll arrive at the sign post that takes you either around Eagle Lake or to Jordan Pond. Stay on the Eagle Lake carriage trail to the left. After a few minutes of hiking from there, you’ll see the Connor’s Nubble trailhead on the left. Head up no more than 5-10 minutes to the summit. The summit itself doesn’t actually offer great views, but if you hike just a few seconds beyond the summit a very surprising view appears almost out of nowhere. One of the great things about this view is seeing the color difference between Eagle Lake and Frenchman’s Bay just beyond. It’s also a trick of the eye played by Mother Nature herself. That strip of land separating the two looks very thin, and almost hike-able. In fact it is hike-able (walking toward Paradise Hill and the Visitor’s Center), but it’s much wider than it appears, with a down-hill section that is out of view farther to the east.

To head back, go down the same way you came up. Once on the carriage trail continue downhill to the left. At some point you’ll come to another trail head that goes toward the South Shore Trail on Eagle Lake, which I advised you to avoid farther up. However, at this point the difficult boulder-jumping is finished and this makes for a very nice walk along the southern shore. Either way, just finish by staying to the left until you’re back at the car.

In total, this is a 2-3 hour hike that’s perfect for getting exercise without the elevation.

To learn more, come stay with us. Check out our availability calendar at: www.miramonte.com.


Acadia Hiking Guide: Parkman Mtn to Bald Peak Loop

Bald Peak

Looking south from Bald Peak

My favorite hike on the island is the Parkman Mountain to Bald Peak loop. I don’t know why it’s my favorite. I guess it has the moderate level of difficulty that I enjoy, and I definitely prefer natural loops, which bring you back to where you started without going over the same terrain. This loop is like that, and even better, one can decide to add on or take off loops, thus making it either shorter or longer depending on one’s needs.

I always park at the Parkman Mountain lot (or across the street), which is on the road into Northeast Harbor (Rt. 198). The lot is at the crest of a hill if going toward Northeast Harbor, but if that’s full then there are lots farther down the road on the other side of the hill. These other lots are just a bit farther away from the trailheads, so just be aware of your whereabouts.

Now, it is much easier to do this loop with a good trail map. This is because the Around Mountain carriage trail winds across the trails of both peaks, and it’s easy to get a bit disoriented. One common theme I hear from guests who didn’t have a trail map is that they ended up at a different parking lot from whence they came. This really isn’t a problem except that walking back up to your car on Rt. 198 is not as nice as walking the same direction on the carriage trails.

This is how I do it:

  • From the Parkman Mtn. parking lot, take a right at the first sign post on the carriage trail. This will bring you to sign post #13. Take a left here and walk up the carriage trail a few minutes until you come to the Parkman Mtn. Trailhead.
  • Head up Parkman Mtn, taking a left near the top to the summit at the trail marker that splits Parkman from Bald Peak. Remember this trail marker for the way down. Enjoy the views of Somes Sound from the summit.
  • Head back down to the trail marker where you turned left and go left again toward Bald Peak. Follow that path no more than 10-20 minutes to the top of Bald Peak. Now enjoy views of the Hadlock Ponds and the bay beyond Northeast Harbor.
  • Head down the other side of Bald Peak until you get to the carriage trail.
  • At the carriage trail, you have two options:
    • Continue across the carriage trail on the hiking trail. If you do this, you’ll hit another carriage trail down further. This is where folks most often end up at the wrong parking lot. At this carriage trail, head right back up to sign post #13, and then turn left to get back to the parking lot.
    • Instead of going straight across, turn right on the carriage trail and walk until you get to sign post #12. At that intersection, go left and – surprise! – in a minute or so you’ll walk right past the Parkman Mtn. trailhead that you went up to start your hike. Follow the carriage trail down to sign post #13 and take a right to get back to the lot.

All told, this is a 2-4 hour hike round trip. Don’t be afraid if there are a lot of cars parked at Parkman Mtn. Not everyone is doing this loop or even these mountains. It’s a great place for cyclists to get on the carriage trails and do some more difficult riding.

And as always, if you’d like to hear this person, check out our availability calendar and book today at: www.miramonte.com.

Acadia Hiking Guide: Gorham Mountain

Gotham Mountain

View of Sand Beach, Great Head, Schoodic Peninsula, and Old Soaker from Gorham Mountain.

We went hiking at 5:30pm on a day in early September, and from trail marker to trail marker we had the mountain to ourselves. We saw no one until we got to the parking lot. This is one of the fascinating aspects of Acadia National Park. It’s one of the smallest national parks in the country and at the same time one of the most visited, and yet it’s entirely possible to go to the busiest sections during peak season and get solitude.

Gorham Mountain is a north-south mountain that runs parallel to the Ocean Drive, the latter of which is one of the busiest sections in the entire US national park system. It’s busy for a reason – it’s beautiful and iconic with Sand Beach, Great Head, Thunder Hole, and Otter Cliffs. The Beehive nearby is one of the most hiked hikes in the park, too. And Gorham is one of the easiest mountains to hike because it’s not tall and not steep, but there it is, with spectacular views and not nearly as many people on it as you’d expect.

I tell guests that Gorham makes for a wonderful introductory hike into the park. One gets to see three of the main sites in Acadia and get away from people at the same time. There are a few different ways to hike it, and they are spelled out below:

  • Beehive to Gorham to the Ocean Path: Park near Sand Beach, hike up the Beehive (steep ladders makes this thrilling to some, but it’s easier than it looks – still, not recommended for those who fear heights), down the Bowl Trail on the back of the Beehive, head over Gorham Mtn., then walk back to Sand Beach on the Ocean Path. This takes about 2.5 – 3.5 hours, depending on how busy the Beehive is. It’s physically easy to hike down the ladders of the Beehive, but because there can be so many people going up, going down would just get in the way. Don’t go down the ladder trail of the Beehive during the season.
  • Gorham to the Ocean Path: This is the more popular route to take, and it’s a bit easier than the Beehive option because it doesn’t matter which side you park on. If Sand Beach is full, just drive all the way down to Thunder Hole or the Gorham Mtn. parking lot after Thunder Hole. It’s a loop, and an easy one at that, so just park, hike in one direction up, and head back in the other direction on the Ocean Path. Give this about a two-hour hike roundtrip without stopping much. During blueberry season, add another 1-3 hours depending on your appetite.
  • Cadillac Cliffs: This is a WONDERFUL section for the kids. Located at the southern end of Gorham, it splits off the main trail and rejoins later on. One feels like one is walking through the land of giants. Kids with an imagination are going to love this section.

We’re full of these types of tips because we do these hikes on our days off. Click our booking engine to reserve today and get more helpful tips at: www.miramonte.com.

Acadia Hiking Guide: Dorr Mountain

Dorr Mtn.

View of the porcupines from Dorr Mtn.

Named after the Father of Acadia, George B. Dorr, Dorr Mountain is one of the more popular and yet overlooked mountains on Acadia. There are four different ways to head up and around the mountain with a couple of paths that connect with others to get to the top:

  • The Schiff Path has lots of steps, but it probably the easiest of the hikes to do. With stunning views of Frenchman’s Bay, this is our favorite hike for Dorr.
  • The Ladder Trail is a vertical trail that heads straight up the east face of the mountain. It’s less exposed than the Precipice and Beehive, but still fun, and Dorr is a much larger mountain than Champlain (Precipice) and the Beehive are. The Ladder Trail, or the East Face Trail, connect to the Schiff Path for the hike to the summit.
  • The North Ridge Trail starts around the Sieur du Mont Springs area and the Jesup Trail. It can be linked from the Kebo Mountain Trail, and for a long day is walkable from the Mira Monte Inn.
  • The South Ridge Trail is a long hike that connects to the Canon Brook Trail or the Gorge to the east (not to be confused with the Gorge Path – see below). One can head down the South Ridge and take a left on the Canon Path back to the parking lot, or turn right toward Canon Brook and it’s wonderful waterfall. If going to Canon Brook, take the A. Murray Young Path back up the western side of Dorr. This is a long loop that summits Dorr twice, but is well worth it.
  • The Gorge Path, on the western side of the mountain, is usually used to hike Cadillac Mtn., but there’s no reason to avoid it going up Dorr.
  • The A. Murray Young Trail heads down the western and southern ends of the mountain near Canon Brook (see South Ridge Trail above).

To get more local advice such as this, book now to reserve your seat at the breakfast table at Miramonte.com!

Acadia Hiking Guide: Ship Harbor, Wonderland, Seawall, and Bass Harbor

Ship Harbor

Ship Harbor in Acadia National Park

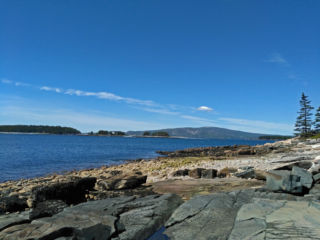
Ever wanted an easy hiking day when you could knock off two hikes, go ocean gazing, see a lighthouse, and eat at one of the best lobster-eating spots all at the same time? We here at the Mira Monte have been advising this little tour for several years now for those looking to get outside without exerting too much physical effort. It takes about 2-4 hours if done at the right time, and that includes the eating part, too!

Drive through Southwest Harbor and take a left onto Rt 102, also known as Seawall Rd. After driving about 10 min, you’ll come to Seawall, a beautiful, natural sea wall with tide pools to explore and fantastic granite rocks to lie down, read a book, and watch the boats float by the southern shores of Mount Desert Island. If you don’t do the lobster pound noted below, this is a fantastic picnic spot.

From there, head down the road about two minutes until you come to the Wonderland and Ship Harbor parking lots. They are about 100 yards apart from each other, so if you can’t get parking in one, try the other. Each hike is about a 20-40 minute hike out to the sea and back. Wonderland has a bit more spread-out views, similar to Seawall, while Ship Harbor has a deceptively shallow harbor to explore (especially at low tide) where more than a few ships have been wrecked.

From these two hikes, head a bit more down the road and come to Bass Harbor Head Light. Parking here can be difficult, but just because you see cars parked on the side of the road doesn’t mean it’s full in the lot. There are two ways to see the lighthouse, off to the right (a paved path that takes you down by the bell) and off to the left (wooden steps that lead out on to the rocky foundation of the lighthouse itself). The left-hand walk (no more than 5min) is a very popular sunset destination.

Finally, if you’re in the area between about 1:30pm and 5:30pm, head over to the other side of Bass Harbor to the town of Bernard and sit outside on the deck of the working-dock restaurant known as Thurston’s. Not only is this one of the most beautiful, rustic spots to eat, but the value is fantastic, too. They are open more than just during these times, but Thurston’s can get quite busy at lunch and dinner.

To book your stay at Mira Monte and get more hiking tips, check out our availability calendar here. See you soon!

Acadia Hiking Guide: Grindstone Neck

Grindstone Neck

Looking at MDI from Winter Harbor’s Grindstone Neck


OK, we admit that Grindstone Neck isn’t really a hiking trail per se, but we at the Mira Monte Inn strive to help our guests see not only the mandatory highlights but also the not-so-well-known areas to hit. Yes, Schoodic Peninsula and Winter Harbor have been frequented much more often the past few years, and this has brought traffic to the area. But this is a good thing because since the Navy left the base out on the tip of  the peninsula, Winter Harbor has had little economic activity apart from the park (in fact, the town no longer has even a school!). But here’s the thing, almost everyone heads straight for Schoodic Peninsula upon arriving in Winter Harbor, and that’s great, but it’s also not all.

Grindstone Neck is on the opposite side of Winter Harbor from Schoodic Peninsula. It’s an area loaded with money and families who preferred a view of Mount Desert Island as opposed to the actually living on the island. It’s a fair point because the views are spectacular, and almost no one goes Grindstone beyond locals. When taking the ferry boat over from Bar Harbor, the boat passes right by the neck before it lands on the town dock. In fact, the piece of land right across the harbor is, in fact, Grindstone itself.

Now, Grindstone Neck isn’t exclusive. Without getting too lost (not a bad thing if you want to do some “house shopping”), there’s a cul-de-sac at the bottom of a hill that has no houses around it. Park here and walk out onto the rocks to get immediate results. Head right and you’ll get dramatic views of MDI and its eastern mountains. Head left and you’ll get the wonderful coziness of the small islands in the harbor of Winter Harbor itself.

To get there, take one of the boats from Bar Harbor and, upon getting off, walk up the street and head left once in the gallery area of downtown. There are several different roads leading to Grindstone, but the road called “Grindstone” is probably the easiest. If you’re driving, when you come into town and hit the T intersection, Schoodic Peninsula is to your left and “downtown”, where the galleries and eventually Grindstone Neck are, is to your right.

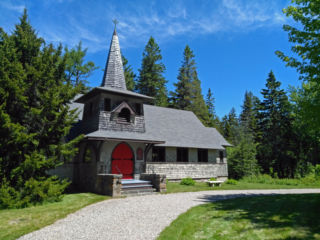
There’s even a nice little church on Grindstone, and because this is Maine and this is Winter Harbor, the doors are always unlocked!

To book your stay at the Mira Monte to get more info like this, check our availability calendar here.

St. Christopher's By the Sea

St. Christopher’s By the Sea

Acadia Hiking Guide: Jesup Trail

Acadia National Park Jesup Trail

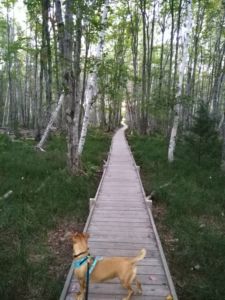
The boardwalk on the Jesup Trail.

Sometimes the park is furiously busy. I’ve been in a car on the Park Loop Road, just past the Precipice parking lot before the toll booths, that has taken over 1.5 hours to get to Sand Beach. That’s less than a mile in that time. Yes, Acadia is magical, and it is one of the most beautiful parks in the United States, but at times the hot spots can get crowded and parking can be next to impossible. That’s why we at the Mira Monte Inn have a few trails that we can recommend where one can leave the car at the Mira Monte and hike straight from the front porch. The Jesup Trail is one of those hikes.

As you can see from the photo, I walk my dog out here quite a bit. From the Mira Monte, out to Sieur de Mont Springs and back, the hike is about 1.5 hours and is mostly flat. One also gets to walk on the Great Meadow Loop enroute. And if you want to make things a bit longer, you can add other loops such as the Hemlock Trail, the Strathden Path, and even Kebo Brook and Kebo Mountain. For more serious hikers, the Gorge Trail and therefore Cadillac Mountain and Door Mountain are also accessible off the same system of trails. The Great Meadow Loop alone is about an hour, so there’s a shorter option if that fits your itinerary better.

To get to the Jesup Trail from the Inn, walk across the street to Spring Street and follow that straight, keeping the kiddie pool at Glen Mary to your left, out to Ledgelawn Cemetery. From there, look diagonally right across the street and you’ll see the start of the Great Meadow Loop. Most of the Great Meadow Loop is on private land, but that’s OK as it is designated as a hike in the area. Follow that around eventually to the left where you’ll walk along the road a little bit near Kebo Valley Golf Course. The path picks up a bit down the road near the Holy Redeemer Cemetery. Actually, at the Holy Redeemer Cemetery you’ll see access to the Strathden, Kebo Brook and Mountain, and Gorge Trails, so you can do that if that’s your wish.

To head to the Jesup Trail, keep going up the path that follows the road. At the Park Loop Road, stay left on the Great Meadow Loop until you come to the Jesup Trail sign post. Cross the Park Loop Road and you’re there. To come back, either re-trace your steps, or follow the Great Meadow Loop around, eventually ending up on the other side of Ledgelawn Cemetery. There’s even a nice rocky brook to soak your feet in near the end of the hike. Pandora, the pup in the picture, uses that as a must-stop drinking spot.

Do this hike at dusk and there’s a high likelihood you’ll spot some deer.

To get us to repeat these directions in person, check our availability calendar here.